Lightroom Presets for Global Masking
Getting the most refined results from Lightroom Classic requires a workaround I invented using global masks. Global masks allow you to make the kinds of adjustments that Photoshop users have made for years, and to “dodge” like darkroom users do. This allows you to make more refined adjustments in Lightroom Classic.
I’ve created a preset to make it easier to add global masks to your photo, and I want to share that preset with you. In my workshops, I teach how to make a global mask from scratch, but using these presets is much faster and easier.
When you apply this preset, it will not change your file except to add three global masks. To use a mask, turn it on with the eye on the far left of the mask, then make the adjustment you want to apply, and brush out any areas you don’t want that adjustment to apply to.
If you’ve taken one of my Lightroom workshops, you understand how this works. If you haven’t, let me recommend my pre-recorded Lightroom class, or my live Lightroom classes offered over zoom.
I make these presets available to use for free in your photos, and you can share the presets with others as long as you include the PDF I’ve included with the zip file. If you want to support me creating more products like this, Venmo me a coffee @richseiling or become a subscriber to my substack at the link below.
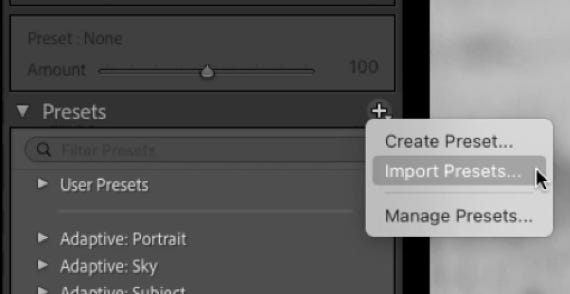
To load presets, choose the Develop module, find Presets on the left, click on the plus button and choose Import Presets. Then, choose this preset and import it.